Creating great visual content is always been a great plus point for your Instagram feed.
As of 2017, Instagram stated it has doubled its active user base in just 2 years. This means a lot more people are sharing, and viewing photos on social media. Instagram has worked better than most other social media apps because it is visual and more likely to get shared.
In other words, people like to view more, not to be told, and of course love to share more photos. For that reason, I thought of putting together the apps I use to create great visual content on my feed. Some of you have plans of creating compelling photos for your businesses on social media. And while it can be worth investing time or money into photo editing softwares, many of us have plenty of editing apps that we pay for.
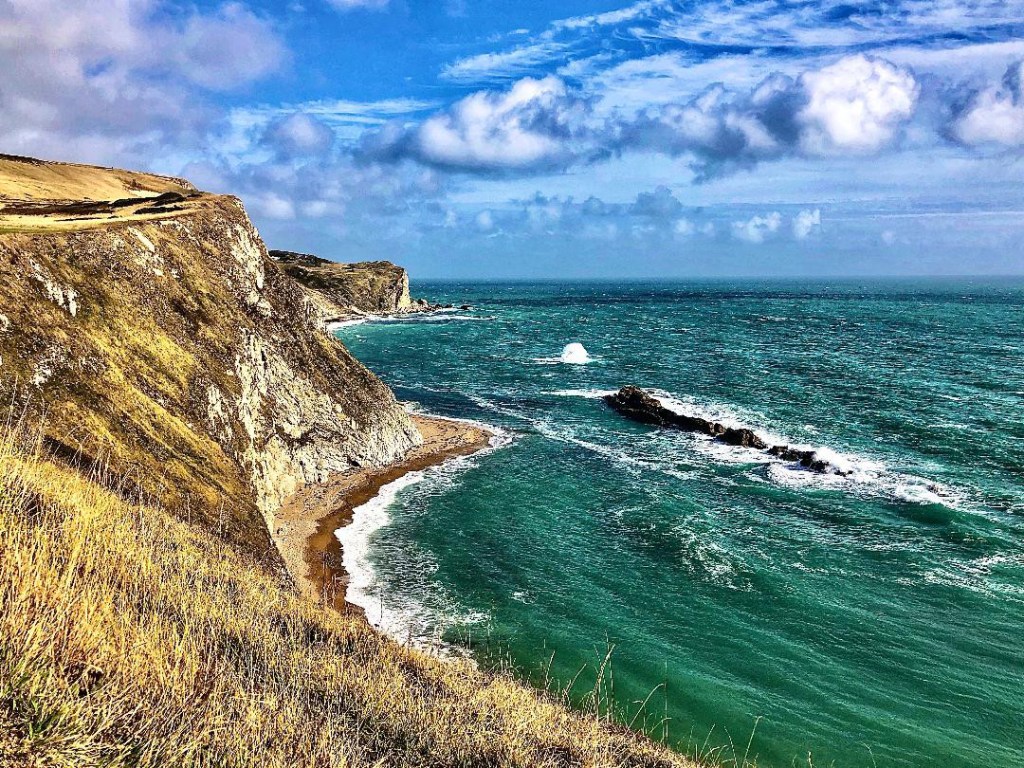
I have chosen a sample photo for this blog and I am going to take you through a simple FIVE step process by which you can edit your photos. I have chosen this really beautiful photograph of the white cliffs from my visit to Dover. I chose it because it had a good composition and just a few natural shades. The photo below is unedited at the moment as I wanted to show you how it looks without trying out any filters as yet.
STEP ONE:
Choosing the right photograph!
This sounds like a very simple and basic thing to understand, but it is not always. Traveling around the world, I come across lots of interesting places where I am always tempted to click a nice photograph. The reality is, I take plenty of those photos and after a point it all starts to feel like junk on the phone. So I found a way to start shortlisting photos as soon as I am done with my day. I make it a point to select 2-3 photos from every place I visit. This also makes me decide on which one I should edit and finally post. So hence, the first step is to select the right photo!

STEP TWO:
Using the inbuilt iOS 13 photograph editor!
The new iOS 13 photograph editor is simply excellent to create great photographs and make them look more defined. Three presets I always go for are:
Brilliance
Definition
Vibrance
I think these three by itself can transform it into a high definition photograph. Be careful not to go too overboard with the vibrance because it can tend to make the photograph look artificial in some ways. Using it to about 50% can make all the difference. Here is a photograph of how it looks after these three filters have been applied.

STEP THREE:
Using Adobe Photoshop Lightroom!
This is one of the best photo editing apps on the phone. I used to use this for most of my photos until the iOS update. I enjoy Lightroom because of the clarity, sharpening and vibrance filters. I usually just use it to touch up the photograph a little more after iOS. This is where I usually add the tints on the photographs and set presets on the app. Here is what it looks like after LR.

STEP FOUR!
Using Snapseed!
Snapseed is simply wonderful when it comes to using exposure and dodge and burn which can lighten up areas on your photos when it didn’t have sufficient light. I use snapped only for certain kinds of shots that are flat lays and low exposure shots. With flat lays, by increasing the exposure to the highest, I love to whiten the background making it look like items were laid on a white table. For this example, I am not going to be using Snapseed, but it is one of the best recommendations of an app that can suggest.
STEP FIVE!
Instagram to Touch Up!
Even though there are so many apps that do the work of 9/10, Instagram still has a couple of simple filters, the best ones I go with are Lark and Juno. I think I prefer to use them only when LR or iOS filters don’t look very prominent. And that’s all, your photo is ready!!
Another friendly tip I would like to share about photographs on my Instagram is the fact that I always try to stick to a theme. I often use photos in sets of three’s to make the feed look like it shares a mutual theme. Sometimes, that gets quite challenging to do because when I travel, I always have to choose good photos that I know would suit my theme. However, I have always been invariably lucky on good shots!
I hope this blog has given you more clarity about how you can edit photos and make them look great for your social media profile. Whether it is a fashion or scenic post, choosing a theme you can stick with and presets you enjoy can make your profile look nothing less than fantastic!
Lots of Love,
The Road Dress Travelled x
